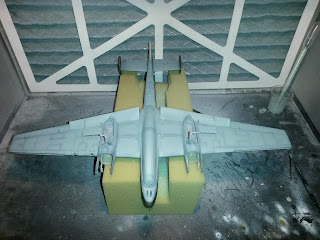
Well, after the set back with the Tomcat, I decided t was time to get this project out and finished. When I looked back through my blog, I realised it has been over two years since I last did any work on the Bf110. So that is what has given me the push to finish the girl off.
When I last posted this project on here, the main construction work of the fuselage, wings, tail plane, undercarriage and engines had been done. They were all in separate sections waiting to be assembled together, and that is where progress stopped. Whilst it has been stored away, one of the undercarriage assemblies got slightly damaged. So this was the first thing I had to repair before continuing with assembly. I also discovered at this point that the undercarriage gear was the wrong way around, so that was also rectified at the same time. Now I could start to assemble the wings and tail plane to the fuselage and any other items to it before I started the painting stage.
Once I was happy that everything was added to the point of painting, I masked off the cockpit interior, engine mounts and bays. After nearly three years since starting her, it was time to get some paint on her.
After giving the model a coat of Alclad grey primer, I started to pre-shade all of the main visible panel lines on the aircraft. I just used matt black thinned about 60/40 mix towards thinners. This way it is not too heavy to start with and you can go over again to darken it if needed.
Next I went over the areas of the lighter colour for the camouflage with RLM71 Dark Green, building it up in light coats to get the shade right. Then masked off these area in the pattern of the scheme used on the aircraft.
The dark colour of the scheme was done next using RLM70 Black Green, again using light coats. Once this colour was dry, the camouflage scheme masking was removed and the whole upper side was masked ready to paint the underside of the model. For this, RLM65 Light Blue was used sprayed in light coats and then left overnight to see how it came out. This morning I inspected it in daylight and was happy with how it came out. So all of the masking was removed and this is the result below. Next I will be adding the decals and more detail painting before moving onto final assembly and weathering. My next decision to be made on this model is which cockpit canopy to be fitted. Shall I use the one piece canopy or the multi-piece canopy? I will make a choice closer to the end.


No comments:
Post a Comment