Tuesday 17 May 2016

Nissan R32 GT-R "Going to finally finish it" WIP#1

Now, I guess some of you will be wondering why there are photos of a finished model of a Nissan GT-R posted below. Well the answer is simple, I never finished this project. Externally, she looks finished, but I never got around to fitting the engine, exhaust and engine bay detail.

A brief run down of this project. The kit is an Aoshima Skyline R32 GT-R from the "Street Tuning Drift Machine"range. Now, these kits are kerbside only, but Aoshima did produce an engine detail set for their R32's. But this was not good enough for me so I cast myself some RB26 engines from the Tamiya engine out of their R32 GT-R, solely for use in the Tamiya R33 and R34 GT-R's. So I decided to fit one into this model to but.


Work had started by cutting away the bonnet from the bodyshell and the lower engine detail away from the chassis. I had also made a bulkhead wall and front brace in the engine bay and painted it. But that was as far as I got with the project. Now, eight years down the line, I decided it was time to finally finish the GT-R off.

The first thing to sort out was the hinges for the bonnet to open and close. This was done over a few evenings, then after several attempts, I managed to get the to hinges work how I wanted them. There is still a little adjustment to be made to allow the bonnet to sit in the closed position properly.


Next I needed to redo the front strut housing tops as the filler that covered them had cracked up. So I cleared the filler away and scratch-built some new parts out of plasticard to replace the missing detail.


Now I could finally get the engine mounted in its position and then start adding the front pulleys and fan to find the location for mounting the radiator. This needed some modifications done to allow it to sit low enough to clear the bonnet and let the engine sit correctly. Work continued with adding the front differential unit after some chopping around of it.

The turbos were next in the order. Once they had been cleaned up, the two halves were glued together and the mounting holes in the engine block were drilled out for the pins to go in. Unfortunately, I did not have any of the inlet manifolds cast up, so I used the one from the Aoshima engine set instead. I am also planning to use other items from this set to finish off the engine bay to save me having to scratch-build the parts. So this is as far as I have got now. I just need to sort out a few more things in the engine bay before it gets re-painted. I think I will paint it white this time, just to show the engine better.


The following photos show how the GT-R looks with the bonnet open and engine in place. There is a bit more work to do yet, but I hope to have this finished in the next few weeks. The bonnet needs respraying as there was a mark in the paint right in the middle of it. But I am toying with the idea of using some carbon fibre decal on it instead.


Land Rover 7 Ambulance Finished

Well, another project finished within a few months of it starting. I am getting a bit of a habit completing a project soon after it has been started over the ladt year. 

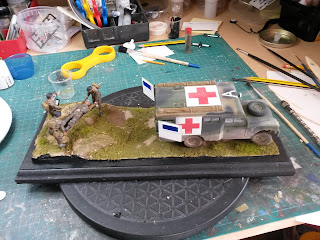
The base was the final stage of this project to complete, and the end result was quite satisfying. Once I was happy with the flow of the terrain, I worked out where there was going to be areas of soil showing through and painted them. Next it was to cover the remaining areas with various grass scatter using PVA glue to stick it down. Some earth pigment was used on the exposed soil to match the dust on the Land Rover. 


To finish off the diorama, the figures were glued in place followed by the Land Rover on the lower area of ground. 


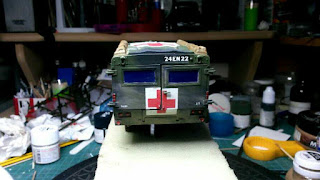
Taking into account the age of this kit, it built up very nice and without any problems. Even the decals were still okay with only a slight crack appearing on the largest one. Fair enough, the figures are not up to today's standard of tooling, but these could always be replaced by newer aftermarket ones. In all, I am pleased with the end result and wait to see the response at its first outing at a show. 


Sunday 15 May 2016

F4 Corsair Diorama Base Update

This is just a little update on the Corsair's diorama to close the final stage of the project down. As I had said in a previous on this project, I needed to make a wooden plinth for the plastic deck base to sit on, allowing the battery pack for the motorised model to be fix underneath. A few weeks ago, I finally got around to making it then painted it a couple of weeks back. Now the base has been glued onto the plinth and battery pack fixed underneath it. Another project finally done and dusted, even though it has taken three years to complete.


Sunday 1 May 2016

Land Rover 7 Ambulance WIP #4

Now that the Land Rover and figures are all finished, it is time to start weathering the ambulance and start on the display base for them. First we will look at the weathering on the Land Rover, I started with a wash underneath, suspension and wheels using Ammo's Earth wash. Next I gave the model a dusting with Ammo's Europe Earth pigment, working underneath, around the wheels and concentrating over the lower half of the body. I wanted to create a more dusty effect, just like you would get travelling overground during a dry summer. The photos below show how the model looks so far, but I will be doing a little more to it later.


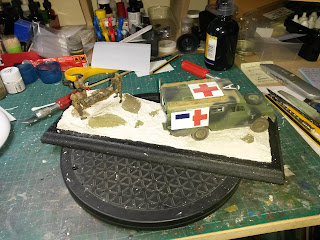
This is roughly how the positions of the Land Rover and figures would be on the base. But as you can see, there is no scenic detail in these photos so the positions could change slightly. But I did this just to plan out the next step after the MDF was sealed and painted.


Now the early stages of creating the landscape on the display base. Once I had masked off the border around the edge of the base, I worked out the positions of some larger piece of rock to create the raised area of the display. This is where the figures are going to be positioned once the base is finished. I also decided that there should be some more rocks buried in the ground where the Land Rover is going to sit. So a few thinner pieces were selected and shuffled around a few time until I was happy.

Now it was time to mix up some car body filler, lay a thin layer over the base and place the rock pieces into the positions in the filler. With what was left of that batch, I started to build up the area between the large pieces then left it to dry. I tend to use car body filler, and the equivalent wood filler because it is fairly light, strong and cures in a short period of time. This way you can make two or three applications of the filler to build up landscapes in a hour. 


After a couple more layers of filler, we end up with the shape and contours that are required. I trimmed the excess filler with a sharp knife to the edge of the masking tape and removed it. Any areas that are not correct or are making the figures stand incorrectly, can trimmed and sanded away very easily. Next I will re-mask the edge of the base, do a bit more filling on the outer faces of the raised area to smooth them off before adding the scenic materials to the display. 


The Land Rover and figures locations are now set, this is how they are going to look once the base is finished. Now onto the detailing side of the base to finish it off.