Three models have been added to my "Finished Model" pages on my blog. These are my Panther 2 Mine Detecting & Clearing Vehicle to the Armour Page, and my Jaguar Mk2 Coombs and Lancia Stratus Rally Car to the Automotive Page.
I hope you enjoy looking at these and check out my website for more details about them.

My Blog for updating progress on current "Work In Progress" modelling projects, general news and chat.
Tuesday 29 November 2011
Sunday 27 November 2011
KA-6D Intruder Tanker WIP #6
What a busy weekend it has been, the only modelling was done on Friday night with yesterday and today doing things around the house.
Now, the intruder is about 98% finished, there is only a few little things left to do on the model now. The wings are now fitted along with the resin seats in the cockpit and the canopies. Basically, there is only a few parts left to go onto the model now and some more weathering. There is one small problem though! I cannot find one of the front undercarriage bay doors at the minute. I know I had it and painted it white, but it's not in the box I stored the parts in. So I need to have a tidy upon my workbench to see if it on there, otherwise I'll use the other Intruder kit's door as a master to make a new one for this model.
So here are a few new photos of it I took earlier.


Thursday 24 November 2011
StuG III Ausf.F WIP #3
I got a little more done on the StuG III at work today and yesterday, so it's slowly getting there. Only a small bit of work got done yesterday, it was just the headlights assembled and fitted to the front of the hull and a couple of smaller parts. But today, I fitted the engine hatches to the rear of the hull and started on the splash guards (or whatever they called, can't think of it at the minute). My plan is to get the main structure done, but leaving off all of the tools, wheels, tracks, etc. Then get it primed and painted in the base colour and camouflaged before fitting the wheels and tracks.
So there's still some building work to go before this happens, another couple of weeks I think before any painting starts. Then there's the figures! This is where I've got to improve my painting, it's the faces and skin tones that beat me. Hence some lessons planned from a couple of the club members are needed.
Now to do a little more on the Intruder tonight.

Tuesday 22 November 2011
StuG III Ausf.F WIP #2
Today I was parked up for a couple of hours at a collection this afternoon, so some work was done on the StuG III during this time.
The upper part of the hull has been fitted to the lower section, but the hatches have been left off for painting. Also fitted are the air intakes for the engine and the storage boxes on the hull sides. The gun barrel is assembled, but needs to be cleaned up before fitting to the mantle. These will be fitted in place once the hull has been painted. Hopefully I willhave some more time spent on a loading bay tomorrow, so I can get some more work done on it.


The upper part of the hull has been fitted to the lower section, but the hatches have been left off for painting. Also fitted are the air intakes for the engine and the storage boxes on the hull sides. The gun barrel is assembled, but needs to be cleaned up before fitting to the mantle. These will be fitted in place once the hull has been painted. Hopefully I willhave some more time spent on a loading bay tomorrow, so I can get some more work done on it.


Monday 21 November 2011
KA-6D Intruder Tanker WIP #5
I've decided to make a push and finish the Intruder over the next few days. My target is for this weekend, with any luck, but this depends on what time I have after work, etc.
Weathering has started using Promodeller's washes, but during painting, some rough areas on the fuselage have appeared causing the wash to adhere where I didn't want it to. But this could help with the general weathering of the model though, as it is mainly underneath the fuselage. The external fuel tanks will not be weathered as much, giving them a newer look and some contrast. So, at the stage the model is at this point, the undercarriage, the external tanks and air-brakes are fitted. Most of the painting is done now, just some detailing painting required in a few places. The ejector seats need to be finished painting before fitting in the cockpit. The folded wings need fitting, plus the support stays need to be made as none were supplied with the kit. Once everything is done, some final weathering to finish her off.
Here is a few photos of the builds latest stage.


Sunday 20 November 2011
BAe Hawk T1 WIP #3
A little update on this project. After some cleaning up of some marks in the paint work, I gave the model another going over with the black paint yesterday, then a coat of gloss clear this morning. So after allowing the clear to harden over the day, I started with the decals a couple of hours ago. So far, I've done the tops of the wings and the main decals around the tail section.
I'm putting it aside for now to let the decals dry properly before any more handling, I don't want to damage any before moving on with it. So whilst this is happening, I'll get the Intruder out for a bit and progress on that.


I'm putting it aside for now to let the decals dry properly before any more handling, I don't want to damage any before moving on with it. So whilst this is happening, I'll get the Intruder out for a bit and progress on that.


Friday 18 November 2011
StuG III Ausf.F WIP #1
Last Friday, I had to make a decision on what kit to take to Telford with me to work on. This was made a little more difficult when this kit arrived in the post that morning. So a choice had to be made and it was the StuG III which won the fight.
This should be a straight forward build to do, only a few bits of etched detail to be added, in otherwords, I can build it straight out of the box. So on Saturday I got started, the first job was to assemble all of the road wheels, idler and drive sprockets. Some flash needed to be removed, especially on the idler sprockets and there is still a little cleaning up to do on them. Next was to add all the suspension arms to the hull. There was some mouldlines on them, but these were cleaned away with some scraping and sanding. I first mounted the end arms with their shock absorbers to get the ride height, then all of the ones in between when the hull was standing on a flat surface. Once they were in position, each was given a drop of glue to hold them in place, then the same was repeated on the other side. That was as far as I got over the weekend.
As some of my other projects are at the stage where it is awkward to take them to work with me, this one is ideal. So over the last few days, I finished off the suspension and the lower hull assembly. I'm not adding the exhaust yet, as they will need to be painted separately and weathered before fitting. Today I started on the upper hull sections. After drilling out a few holes in them, I started remove the details on the mouldings as per the instructions. Once the upper sections are finished, I will paint the interior with some German Tank Interior paint before joining them. But this will be a few days off yet.
So, tonight I'm doing a little work on my Hawk, giving it another going over with the black paint after cleaning up some marks in it.


Thursday 17 November 2011
Guest What I Ended Up Building Last Night?
Yesterday was my grandson Kyran's birthday, so after dinner, it was my job to build one of his presents.
He is Dr Who mad at the minute, he's got a remote control Dalek, trading cards, sonic screwdriver and the Airfix Tardis that I'm building for him (slowly). But yesterday, he got the Character Building (which is like Lego) Dr Who Tardis which has the interior and exterior with alien landscape.
Give me a nice difficult model kit to build any day. This is meant to be for kids to build, it took me over two hours to complete it! There's multiple bags containing all of the pieces, and as usual, there is always the standard single piece missing. I needed those couple of glasses of wine at the end of this.
So now, I've got until Christmas to recover. We have already brought the Dalek Factory for a Christmas present for him.


Monday 14 November 2011
Great Weekend At Telford
What a great weekend we all had, myself and the club. The stand theme for this year was "MK Gets Married", where the display was based on the saying "Something old, something new, something borrowed and something blue.".


Throughout both days, there was always a group of people in front of the stand, and this always increased when club members, Jo and Peter where at the stand with Jo in a wedding dress. At the end of the weekend, Jo said she had never been photographed so much in her life. In the competition, the club had a reasonable haul of prizes. Dave Scott got two Golds and a Silver, Tim Upson-Smith got a Gold and Silver, and I received a Commendation for my Sprint Car. In general a good weekend.
As for purchases, a big show like this is usually expensive, and it was. My requisitions for the weekend are as follows;
Kits
Dragon Sd.Kfz.142/1 StuG III Ausf.F 1/35th (arrived in post on Friday)
Aoshima Mitsubishi Evo X RalliArt 1/24th scale
Fujimi Ferrari 365 GTB4 1/24th scale
Fujimi Ferrari 365 GTS4 1/24th scale
Trumpter BAC Lightning F.6/F.2A
Dragon Messerschmitt Bf110D-1/R1 "Dackelbauch" with engines 1/48th scale
Tamiya Sd.Kfz.7/2 Flak37 1/35th scale
Revell Arado Ar 240C-2 Nightfighter 1/72nd scale
MDC Figures "Eramus" bust
Accessories
BigEd Canberra PR9 detailing set 1/48th scale
Master Dassault Mirage III/5 pitot tube 1/48th scale
Studio27 GT40 etched upgrade set 1/24th scale
True DetailsB-52 resin wheel set 1/72nd scale
Master Casters intake grills for D.H. Mosquito 1/24th scale
Czech Master's Kits WWII German Pontoon Bridge 1/35th scale
Hobby Design Mitshubishi Evo X badges and logos 1/24th scale
Friulmodel metal tracks for MLRS/M2 Bradley/LVTP 7 1/35th scale
Add to this, various paints, glues, weathering items and general items, it was a great spending spree. But there was so much other bargains that try to tempt me, again, but I resisted with success. Now to get back to some model building.
Updates on current projects will happen over the next few days.
Friday 11 November 2011
Telford Here We Come!
Nearly ready for the weekend.
Most things are packed away and the car is loaded, just leaving a few things left to do in the morning before I leave. As I'm driving up the motorway, the dreaded thought will be going through my mind, "Have I forgotten anything?". This is what happens every time I go to a show.
So tomorrow begins two days of chatting, catching up with friends, waiting for the competition results and spending money. By Sunday night, we'll be crawling through the front doors, tired and hungry reaching out for a drink before falling asleep on the settee. Monday is set aside for recovering, unloading the car and packing away my models. Then I'll be taking the wife out for a Thai lunch.
If any of you who are reading this happen to be at Telford this weekend, pop along to the Milton Keynes SMC stand and say hello. Just ask for Mick.
Look What Arrived In The Post Today!
What good timing, the postman knocked on my door this morning with a package for me.


It was a Dragon Cyber-Hobby 1/35th scale Sd.Kfz.142/1 StuG III Ausf.F, ordered on EBay from China. This had been tempting me for a few weeks after seeing it on EBay, so I took the plunge and ordered it, and it was a lot cheaper then over here.
But it has now added to my dilemma, what do I take to work on at Telford this weekend?
Other projects are at the stages where it would not be a good idea to take them with me. So it's now a choice between this, a 1/48th F-111 or one of my many cars. In fact, it might as well be any of my many kits, except for the large scale aircraft, or even any that I'll be collecting there.
I hate making choices like that.
Wednesday 9 November 2011
MiG-31 Foxhound WIP #4
Just a little update today, no photos though.
Done a little bit on the MiG at work, it's been one of those days and another late finish again. Thank you, you m#*#*s in the office who cannot route plan properly!
Well, I started on the undercarriage so I can check the balance of the fuselage and see if it requires some extra nose weight. Firstly, for a large aircraft like this, the gear seems a little, delicate for the job. Anyhow, one of the front braces decided to break, so a repair job needed there. Now the main gear! This is where I wonder if they decided to throw tooling from two different MiG-31 kits together. Where they are meant to mount in the bays, they don't fit!!! The main struts are too wide to locate between the sides of the bay, the locating pins are too big in diameter to fit into the holes and too long to.
So, modification time again required once they're painted after I work out the best way to do it. So to be on the safe side, the plasticine is coming out and crammed behind the cockpit.
More later.
Tuesday 8 November 2011
MiG-31 Foxhound WIP #3
One slight disadvantage of my job, is that I can be sitting around for a few hours during the day, as what happened today. So this has been spent doing a bit of modelling. I started with painting the Hawks undercarriage, which used up about half a hour. Then it was back onto the Foxhound.
After a little more sanding of the filler around the cockpit and wing joints, some more assembly was done. The rear wings were cleaned up and glued into place, which I think are a bit delicate being held on by one pin. Then the engine exhausts were cleaned of flash and ejector marks before gluing in place. Next was the continuation of the ridge along the top of the fuselage, which consisted of two halves joined together. After a bit of filing and sanding, this was fitted, but a little filler is going to be needed on the gap. The two panels between the exhaust were next to go into place followed by the pylons for the drop tanks and missiles on the wings.
A bit of a productive day, even though it has been a late finish tonight. So I'm not far off get some primer on this one, the interior paint is on order to collect on Saturday, then the cockpit canopy sections can be fitted after masking.
Roll on the weekend and The Nationals.


BAe Hawk T1 WIP #2
Lets bring this up to date.

After the little mishap with the primer, after cleaning it all off, the Hawk received a couple of coats of Humbrol matt black enamel. This was just as good as any primer and it gives a great basecoat for the Xtracrylix Night Black. So the Humbrol paint has had overnight to dry and it looks okay. Onwards tonight with the Night Black, a few light coats to see how it looks and if it's okay, a bit more masking to paint the undercarriage bays.
So here is a photo of the Hawk after the matt black had dried.

Monday 7 November 2011
Vallejo Primer Update
A couple of weeks ago, I was saying about my discovery of the Vallejo Primer. Well, now that I have used it a few times since then and generally I'm still pleased with it. But this weekend I used it on the Hawk.
It went on the model without any trouble as previous. Only this time, I noticed some gaps in a couple of joints so as normal did a bit of filling as usual. It was only when I went to rub down these areas, that I noticed the primer was peeling off the model!
This has had me puzzled today, not sure if it's something to do with the plastic, or the fact that it does not like being rubbed down. The model had been cleaned prior to painting so this is still baffling me for now. I think it needs a little research whilst up at Telford this weekend.
Anyhow, back to removing the primer and to start again.
Sunday 6 November 2011
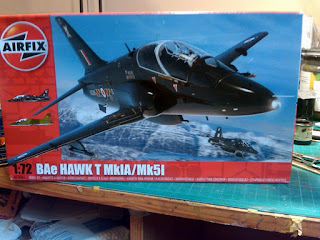
BAe Hawk T Mk1 WIP #1
This kit was brought as a replacement for the kit I was building for the club's December competition, Airfix kit below £10 in 1/72nd and 1/76th scales. My original kit was a Curtis Helldiver, but the tooling dates back to the late 1960's and part of the glazing was missing. So a replacement was needed and I brought this last weekend at Letchworth.
As I wanted to get a head start on this project, the decision was made to put the other builds on hold and crack ahead on this one. All of the fuselage is now built and hopefully all gaps filled, so it is now at the stage to start priming. Everything will get a coat of white primer, then the canopy sections, undercarriage and gear doors a coat of the grey. Once dry and some final masking, a couple of coats of matt black followed by Xtracrylix XA1012 Night Black.
So after this blog is posted, out comes the primer. So here's a couple of photos for you.


Saturday 5 November 2011
Telford
This time next week, we would be recovering from the first day at the IPMS(UK) Nationals in Telford. Hopefully, we will be sitting in the pub down the road from where we're staying tucking into a nice piece of steak. Then we'd be thinking about getting though Sunday and packing up at the end.
With luck, I might have had some success in the competitions, or I might not. But who cares, it's just for fun.

With luck, I might have had some success in the competitions, or I might not. But who cares, it's just for fun.

Letchworth Model Show
Here are a few photos taken last Sunday at Letchworth Model Show. There are a few of the club stand and of other stands around the show.


Sprint Car "Finished"
Well, here it is, the finished Sprint Car.
The base and model were finished a couple of weeks ago, but I have only just got around to taking a few photos of it just now. I am pleased with the end result on this project as I was not sure how it was going to end up. Now I've just got to wait for the other two models to be finished by Richard and Phil then for the larger base to be built.
I took the model to the Letchworth Show last weekend and entered it into the competition. Got Bronze in the civilian vehicles class. It's the Nationals next weekend so I'll have to wait and see what happens there. So here is a few photos.


MiG-31 Foxhound WIP #2
There has not been much done over the last week, I've had a Airfix Hawk T1 to get started on for a competition, so that has taken priority this week.
But I thought it might be an idea to show how big this MiG is by posting a photo of it next the Hawk. The Foxhound is twice the size of the Hawk in the same scale. So how big would it be in 1/48th scale?

More work updates later on this.
But I thought it might be an idea to show how big this MiG is by posting a photo of it next the Hawk. The Foxhound is twice the size of the Hawk in the same scale. So how big would it be in 1/48th scale?

More work updates later on this.
Subscribe to:
Posts (Atom)