Friday 30 August 2013

Supermarine Spitfire FR. Mk.XIVe WIP #1

I have been meaning to start this WIP posting for the Spitfire for the last couple of weeks, but a holiday, family days out and a deadline to get the Mercedes G4 finished has delayed this.

This project is a quick build for our clubs September competition which theme for this month is "Spitfire". I had a couple of other Spitfire kits lying around, but these did not have the correct decal  sheets for them, so I picked up a couple more Spitfire kits at our recent trip to Midland Expo at the end of July. The other kit was an Italeri 1/72nd scale F. Mk.VII, but I decided to go with this below for my entry.


The kit is an Academy "Special Edition" which has the choice of seven different finish options ranging from a RAF SEAC aircraft from Burma in 1945-46, a RAF aircraft from Germany, two Royal Indian Air Force aircraft, one Belgium Air force aircraft, one Royal Thai Air Force aircraft and one that flew in the 1949 Cleveland air race. All aircraft except for the Burma one were all over silver, the Burma one was in dark green and ocean grey camouflage. I chose to do the Burma option.

This kit went together without any troubles, there was minimal flash and ejector pin marks. Assembly in my opinion has been one of the easiest builds for a long while. Below it was at the stage when the main construction minus the tailplanes and wing tips. The undercarriage and prop were only test fitted to get the stance for the photo. 


After the first coat of primer went down, only a couple of joint lines were visible which needed sorting out, very pleasing for this to happen. First I spray the whole upper side of the fuselage with Xtracrylix XA1004 RAF Dark Sea Grey then using my 3-in-1 printer, enlarged the painting diagrams on the instructions to make templates for the camouflage scheme. The grey areas were cut out from both side and upper elevations then matched the templates up to form the complete scheme. Each template part was laid in place on the model using thin sausages of Blutac to hold them in position. Next I spray the exposed areas with Xtracrylix XA1001 RAF Dark Green and removed the template once it was dry. This was the first attempt for me to use this method and I was surprised how good it came out, there was only a couple of little spots that needed to be touched up afterwards.


After drying overnight, the upper surfaces were masked up before receiving a coat of Xtracrylix XA1003 RAF Med. Sea Grey. The masking was removed once this coat was dry and the model was given a couple of coats of gloss clear from Xtracrylix. Next I am going to start on the decals, hopefully this will be tonight if I have time then give the model a coat of gloss clear followed by a coat of matt.


Tuesday 27 August 2013

1935 Mercedes Benz G4 Finished

Well, I finished the Mercedes G4 for the magazine review over the weekend. In the end, after a mishap when one of the lights got knocked off and as I glued it back on, it slipped and some glue got onto the paintwork. So a quick fix was done and it is not that noticeable.

I will not say too much here about the kit, I will leave that to the review in the magazine, I just need to finish writing it up. My plan is to have the model and review down at the magazine this Friday so it can be photographed and hopefully be in next months or the one after that issue. As soon as I know which issue it will be in, I will tell everyone on here.

So back to some of my own projects and try and get some finished for the IPMS(UK) Nationals held at Telford in November. First to get done is a 1/48th scale Spitfire Mk.XIVe for a club competition and then crack on with the Messerschmitt Bf110.


Wednesday 14 August 2013

Messerschmitt Bf110 D-1/R1 "Dackelbauch" WIP #2

My last posting on this model was at the end of June and with all of the general comings and goings of family and work over the last couple of months, my attention has been diverted away from my modelling. This has caused me to fall behind on some projects like the magazine build of the Mercedes Benz G4 and this project. I have also had to start another project for the club to be completed by the end of September. So it is catch up time!

Well, over the last month, there has been the odd session spent on the 110 when I have had time sitting around at work. Some painting has been carried out on the model, this was done on the engines and the cockpit area. I have mainly used Mr Hobby paints with some Tamiya so far. Mind you, most of my RLM colours are from the Mr Hobby range of paints.

Back to the 110. Whilst the cockpit is being finished off with the painting, I have cracked on with the main wing assemblies. These wing went together without any trouble unlike some other aircraft that I have built. There is a couple of build options where the aerolons and various flaps are positioned, even with doing the modifications for these, it was still a pleasure to build them. With this kit, you must remember to refer back to the engine instruction sheet for the engine mountings and the general kit instructions does not have the engine mounting included.


The engines have only be dry fitted at this stage for the purpose of the photos, they still need some detail painting and weathering to be done to them yet. I plan to have the cowling removed on either one side or both, but this has not been decided on yet.


The main undercarriage gear on this model has a good bit of detail on it including the mechanism to lower and raise it. In these photos the gear still needs to be completed with a small part to be added at the bottom of the strut near the wheel. I will add this just before I start to paint the model to avoid them being damaged through handling.


This is one of the radiator assemblies for under the wings which I took a photo of before it was mounted into its position on the wing. The rear flap to adjust the airflow through the radiators can be posed in the open or closed position. 


The upper nose machine gun assembly has been assembled and painted ready to be fitted in the fuselage once I start assembling it. This only needs a little bit of weathering to finish it off.


The cockpit dash hand painted and dry-brushed. No decals for this kit, but I suppose you could use some Eduard pre-printed detailing items for this.


The main cockpit assembly went together without any problems, even when you divert away from the order of construction on the instruction sheet to aid with painting. At this stage I am about 70% done with the upper frame to be built and painted. The etched seat-belts still have to be assembled, bent to shape then painted before gluing to the seats. This job of the seat-belts will be done in my workshop rather then sitting in my truck cab. Once the cockpit is finished and the final weathering is done, the fuselage assembly can be started and then onto the main assembly of the aircraft before painting.


Progress on this project might be a little slow over the next couple of weeks as I have them away from work and I will need to concentrate on a couple of other ones for some deadlines. Plus there will be a few days when we will be doing some family stuff. So by the next instalment of this project, I hope the cockpit interior will be completed and the main fuselage assembly will be started. The main wings are almost finished since these photos were taken, the radiator on one still need to be made up and fitted to the wing, otherwise both main wings are built. 

Happy modelling.

Monday 5 August 2013

Sunday 4 August 2013

1935 Mercedes Benz G4 Update

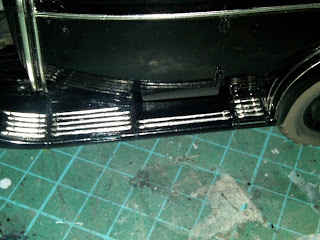
Here are a  few photos taken a week or so back of the review build of the 1/24th scale Mercedes Benz G4 from ICM. Progress has been slow for the last month due to other things, but there has been some progress since these photos were taken.


Iron Man War Machine Finished

Hi everyone, sorry for the lack of postings over the last month or so, but a busy time at work and some big family stuff has taken priority and diverting my attention. But with all of this going on, I have tried to some work done on my projects.

Firstly, Kyran's Iron Man figure was the main aim of my attention just so it was finished for him, otherwise he would keep pestering to finish it, just like I get the odd comment from him about finishing his Dr Who Tardis model!

Well, the construction passed without any problems, except for the ones I caused myself. The worst one was forgetting to fit the rear body panel to the torso before adding the two side panels. When I realised I had done this, it was time to loosen the side panels with some liquid glue to give me enough clearance to side the rear panel in. This worked on one side, but the other decided to split a little in the process. Once the rear panel was in place, the damaged side panel was glued back in place then repaired with some Green Stuff and sanded smooth. The repair job cannot be seen after painting.


The figure was constructed into the main potions of the body, torso, head, arms, legs and guns. This was to make painting the figure easier then if it was all fully assembled. These parts all received a coat of primer and any areas of joint lines or marks were dealt with and re-primed. The instructions said that the colour was dark metallic grey, of which was not in my stock of paints. In the end, I mixed Tamiya's X-18 Semi Gloss Black with XF-56 Metallic Grey to a 50/50 ratio. Once I was satisfied with the colour, it was thinned down and several light coats were sprayed over all of the figures parts. A few panels are silver on the figure, so I used Tamiya's XF-16 Aluminium for this as it looked the right colour and finish in my opinion. The last areas to be painted before assembly were the eyes, chest light and hand blasters (or what ever they're called!), first with some white paint then the edges with some thinned down clear red.


The figure was now assembled, first the legs to the torso then stood on the base to make sure they dry in the correct position. This was followed by the arms, head, arm mounted machine guns, rocket launcher and Gatling gun. The last part of the kit to be assembled was the ammo feed belt for the Gatling gun. This came in several parts and I had decided earlier in the build to wait until the figure was built and the gun was in position. So the fiddly process of building the belt began and after a hour, once the glue had dried, the belt was removed from the figure and sprayed with some Tamiya X-10 Gun Metal then glued into position once it had dried.


The base was given a coat of grey before a wash of a darker grey. The cracks received a wash of black which was allowed to run along the cracks to highlight them. Before painting the edge of the base with matt black, I gave the surface a dusting with some weathering powders to look like dust thrown up when the surface broke up. The same powders were used on the lower legs on the figure to. 

For my first figure in this scale, I was happy with it. But more importantly, Kyran was extremely happy with it.