
Well, things progressed quicker then I thought it would over the last few weeks and a couple of things got changed from the plans. The first thing was scrapping my plan to add the canvas cover on the body. After making the frame up and a couple of attempts making my own cover, I discovered that I had got the frame completely wrong for the body. In the beginning, I could not find any images of the frame, so assumed that they were hooped frames. Then I finally found a photo of a body with the cover removed and saw that it was all wrong. So I decided to scrap the cover and frame completely from this project.

Next, I continued to assemble the model getting it to the stage for adding the decals. Getting the two windscreen halve to fit and stay in position whilst the glue dried caused a few expletives to come out of my hobby room. In the end, masking tape finally held the two panes in place to dry overnight.


This model only has a few decal to go on it. The areas were prepared by giving them a couple of coats of gloss clear before adding the decals, following with some matt clear to seal them afterwards. The cargo body was still separate from the chassis as it still needed the mud to be added underneath it. The doors and bonnet halves were also held in place by blutac until the weathering process was completed.


All of the photos of these Diamond T's had a hook with chain attached to the winch cable on the front of the chassis. Now, I had two lengths of chain come with the kit, but no hook. And does anyone manufacture hooks in this and other scales, I drew a blank finding any. So, a search on the internet for diagrams of the appropriate hooks I had seen in photos and after two attempts and a hour and half, one hook sat on the workbench ready to be attached to the chain and then the cable. In the end I was happy with the resulting item.

The following photos show the mud added to the undersides of the cab, cargo body and chassis. This pre-mixed mud from MIG is good stuff and take the headache away from making your own mud mixture. I will be buying more of this stuff at the next show I visit.


Fitted to the T's were a carrier holding an axe, spade and pick axe, of which some were mounted on the fuel tank and other to the locker door on the other side of the chassis. The carrier is etched brass which needed folding into shape, but from the photos I have got from the internet, the axe head sat behind a plate and the spade blade went behind loop with the handle strapped to the plate for the axe head. These two items were made fro a piece of plasticard and brass wire before fixing the tools in place after painting and fitting the brass straps to them.

The cargo body was finally glued to the chassis and some more mud was added to various areas to finish the look off. In one of the later photos I discovered, it revealed the spare wheels were mounted on a bracket and then to the anchor point on the body. These were scratch built using plasticard and plastic rod, then painted before gluing them to the wheels and then to the anchor points. The wiper sweep areas were masked off using some tape cut to shape and size before going over the model with some washes followed by some dirt and mud colours airbrushed over her.

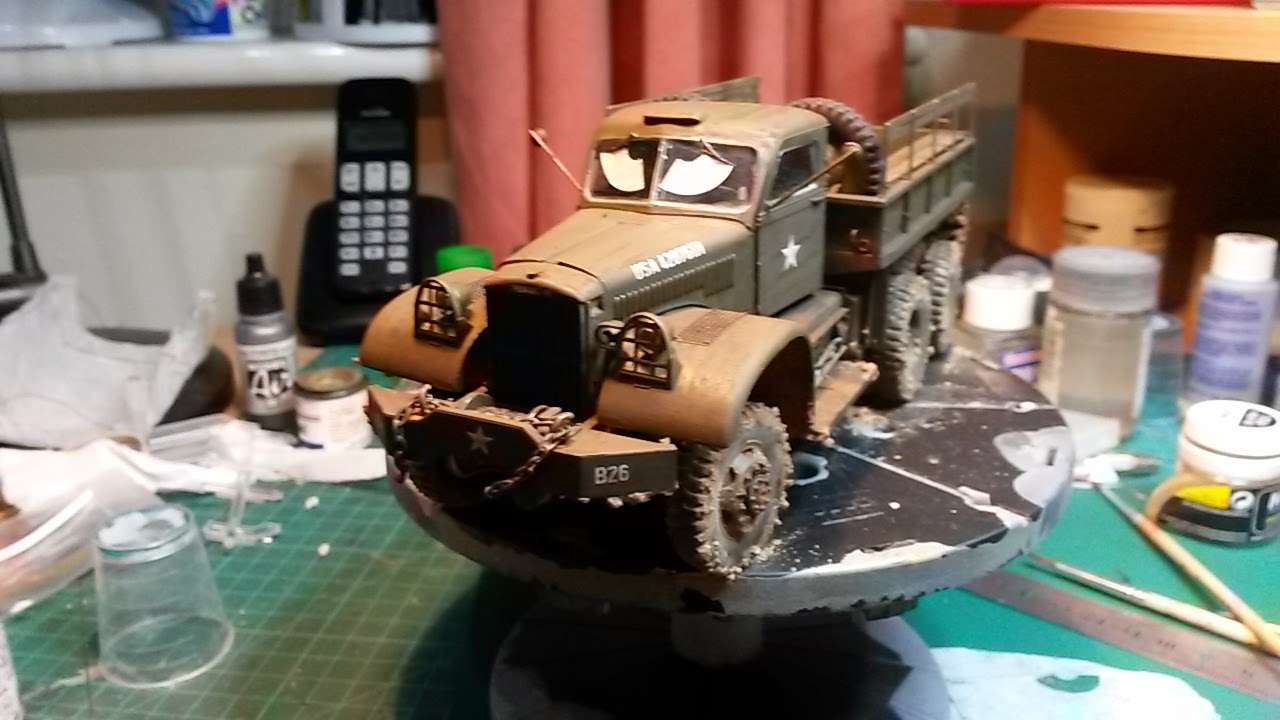

I finished of the truck using some MIG pigment powders before gluing the doors and bonnet halves in place on the cab.
With the house move, this review build has taken a lot longer then I had originally planned. But once we were settled into the new house and I got my modelling mojo back, the Diamond T all came together to produce a lovelly looking model. Yes, she fought me along the beaten path, caused headaches and the occasional bad language. But I pressed onwards and worked through the problems. Now to finish off the write up for the magazine. Hope you like the finished model?


No comments:
Post a Comment