Saturday 26 December 2015

Messerschmitt Bf110 D-1/R1 "Dackelbauch" WIP #4

Well, after the set back with the Tomcat, I decided t was time to get this project out and finished. When I looked back through my blog, I realised it has been over two years since I last did any work on the Bf110. So that is what has given me the push to finish the girl off.

When I last posted this project on here, the main construction work of the fuselage, wings, tail plane, undercarriage and engines had been done. They were all in separate sections waiting to be assembled together, and that is where progress stopped. Whilst it has been stored away, one of the undercarriage assemblies got slightly damaged. So this was the first thing I had to repair before continuing with assembly. I also discovered at this point that the undercarriage gear was the wrong way around, so that was also rectified at the same time. Now I could start to assemble the wings and tail plane to the fuselage and any other items to it before I started the painting stage.


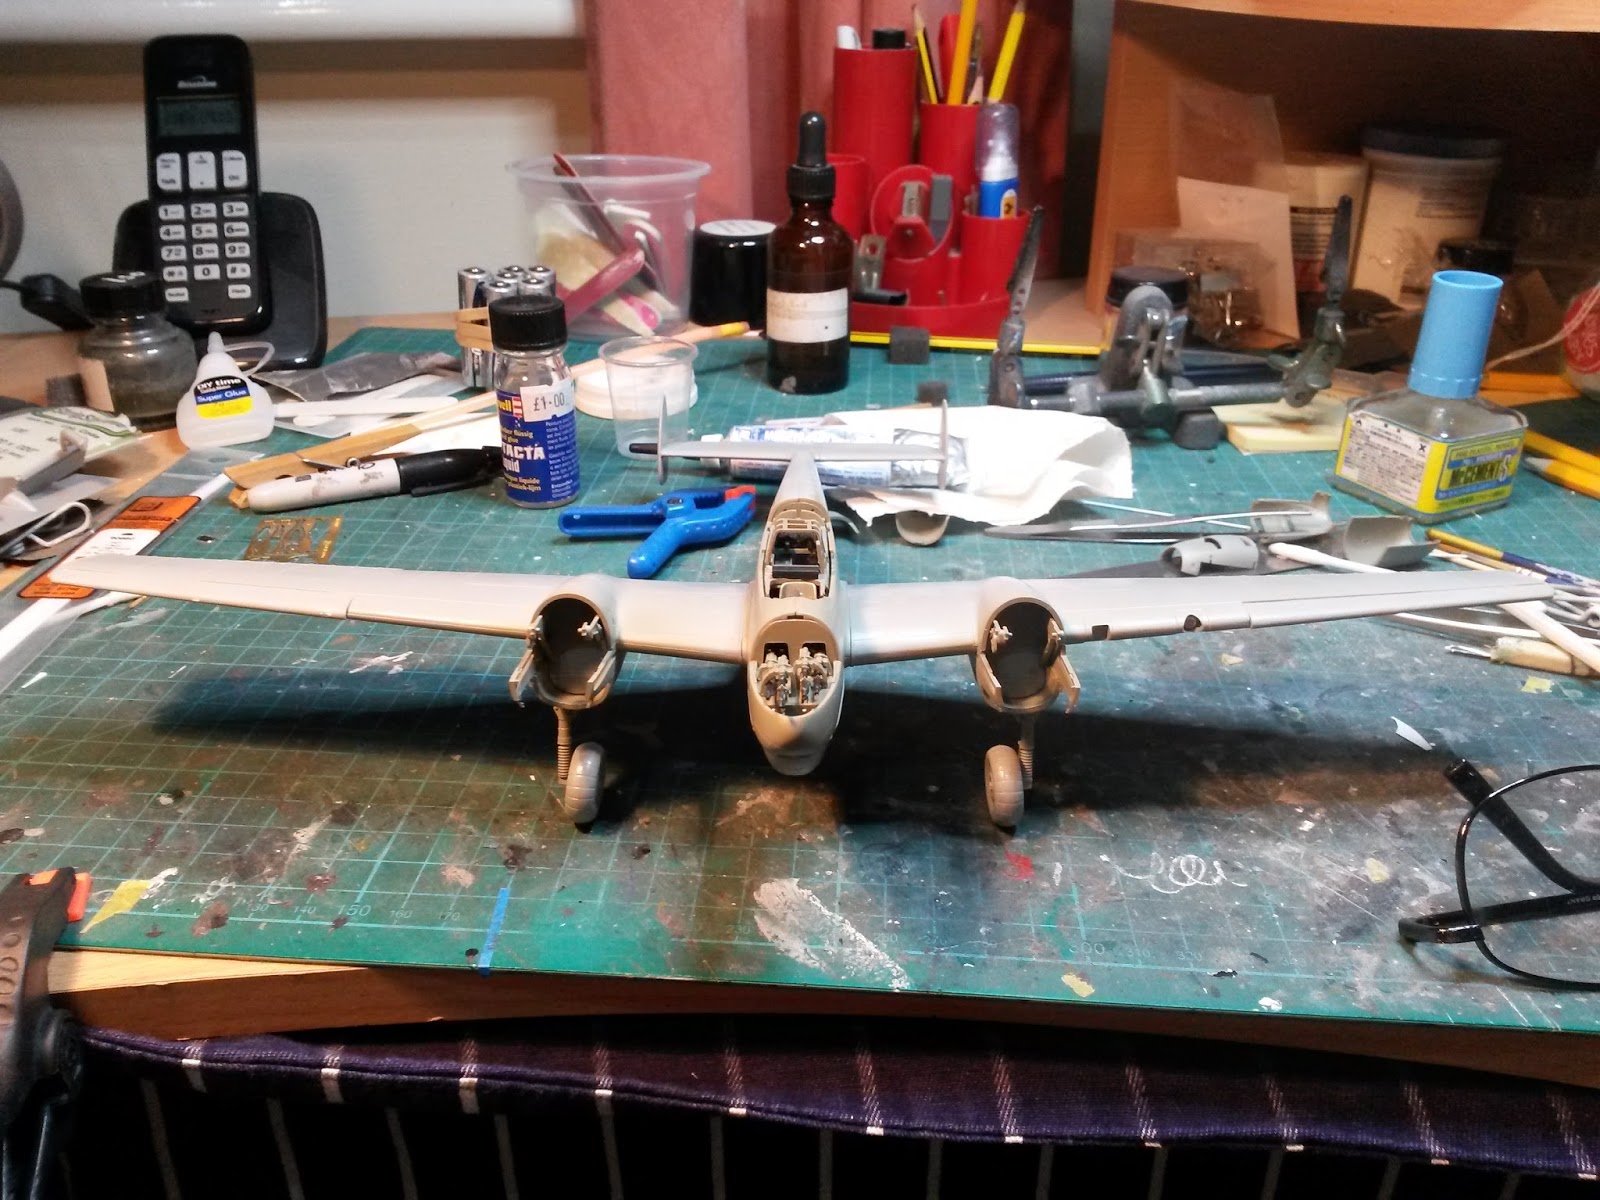
Once I was happy that everything was added to the point of painting, I masked off the cockpit interior, engine mounts and bays. After nearly three years since starting her, it was time to get some paint on her.


After giving the model a coat of Alclad grey primer, I started to pre-shade all of the main visible panel lines on the aircraft. I just used matt black thinned about 60/40 mix towards thinners. This way it is not too heavy to start with and you can go over again to darken it if needed.


Next I went over the areas of the lighter colour for the camouflage with RLM71 Dark Green, building it up in light coats to get the shade right. Then masked off these area in the pattern of the scheme used on the aircraft.


The dark colour of the scheme was done next using RLM70 Black Green, again using light coats. Once this colour was dry, the camouflage scheme masking was removed and the whole upper side was masked ready to paint the underside of the model. For this, RLM65 Light Blue was used sprayed in light coats and then left overnight to see how it came out. This morning I inspected it in daylight and was happy with how it came out. So all of the masking was removed and this is the result below. Next I will be adding the decals and more detail painting before moving onto final assembly and weathering. My next decision to be made on this model is which cockpit canopy to be fitted. Shall I use the one piece canopy or the multi-piece canopy? I will make a choice closer to the end.


Monday 21 December 2015

Atlantic Fleet Squadrons F-14A Tomcat WIP #3

Don't you just hate it when you first think things are starting to go smoothly, then something goes and throws a spanner in the works!

Well, that is what's happened with the Tomcat. I started to paint the model without any hitches. Got the pre-shading done and did a nice job with the base colour building it up in several light coats. The photos do not really show the effect that good, but is was one of the best jobs I had done so far. So I was well chuffed and carried on with the gloss clear to prepare the model for decals. That is where is started to go wrong!


First I started with the stencils on the tail planes. Most of them went down without any trouble, then a few from the edge of the sheet started to break up. Luckily, these were on the underside surface so would not be seen. I initially put this down to the decals being on the edge hence being creased up a little. Work continued onto one of the main wings and passed without any cracking. 


So I decided to add the tailart decals to the fuselage. First I added one of the inner faces of the tails and as it was being moved off the paper, the decal started to break in a couple of places. Thinking this might have been down to some rough handling from moving the decal around, I progressed to the opposite tail. |Disaster! This one broke up into a multitude of pieces. Trying to salvage the decal, I tried my best to repair the damage and rescue the tailart. I had the correct colour red in my stock, so the option was to touch up the damage with that and weather the model heavily to cover it up.

So the two outer decals now had a couple of coats of Mircroscale's liquid decal film and the following day attempted the next one. Again, this broke up so another coat was added to the last decal, but this did not help. The decal still broke up.


So to avoid the Tomcat taking a flight out of the window, I have decided to put her aside for now and finish another unfinished project. What I am going to do is wait until the new year and by some aftermarket decals to replace these old damaged ones. To save the need for repainting her, I will get some in which the aircraft is the same base colour as this scheme. So for now, this project is temporarily on hold and the 1/48th scale Messerschmitt Bf 110 has been dug out for finishing. 

Friday 11 December 2015

Atlantic Fleet Squadrons F-14A Tomcat WIP #2

It has been about four weeks since I last posted about the Tomcat, but work has progressed on her at a steady pace compared to how it had been in the past. So lets bring you up to date with this project.

The air intakes have now been painted, assembled and glued in place on the fuselage. There was a bit of misalignment on one side, which I tried to correct but was unable to due to how something was assembled prior to me buying the kit. So I did my best at sorting it out and filling the gap. Once the main wings are in place, you cannot see this problem as it is hidden slightly. Both of the tails were cleaned up and glued in place to finish off the main fuselage construction. This stage of the construction was finished by fitting the rear panels of the main undercarriage bays. Again there was problems here fitting them due to something earlier being glued slightly in the wrong position. A little bit of trimming was done to locate these two panels better in the bays.  


Now work started on some of the smaller items on the model, with the exhausts being painted before assembling them. The insides were first painted off white with the remaining parts of the exhausts being painted with various shades of Alclad. A few small items fitted to the fuselage were now assembled, cleaned up and glued in position. I decided to leave the small fins and aerials off the model at this stage, this would protect them from any damage and would be added to the fuselage during final assembly of the model. I also finished off the undercarriage gear and stuck them in place with blutac just to see if the model was tail heavy. I wanted to check this out before painting in case I needed to add some nose weight as it was unknown if there was any added by the previous owner. But as you can see, she sat okay which was a relief.


Now I assembled the pylons and drop tanks to the configuration of this specific aircraft I am modelling. These are not being glued into position on the fuselage until they have been painted and will be added in final assembly. 


And to bring this post right up to date, the fuselage, wings and tail planes have all been sprayed in white primer and then had some pre-shading on most of the panel lines with thinned black paint. Now I started to slowly build up the base colour over the pre-shading with multiple light coats of Xtracrylix's XA1137 Light Gull Grey (FS 16440). It was surprising how long this did take to paint the fuselage and wings, by the time I got to this stage of finish, it was about two hours worth of spraying. Not looking forwards to painting the 1/32nd version I have in my stash. I am not sure how well the shading can be seen in the photos below, but it actually looks okay in the flesh. 


Due to the little problems I have had with this model from the previous construction issues, it has pushed my thoughts towards finishing this aircraft as one towards the end of its active life, a bit worn and tired. This might help to hide some of the issues which have arisen from not being able to start building the Tomcat from the start. So some possible heavy weathering might be heading this way!

Thursday 3 December 2015

New Galleries On Website

A couple more galleries have been added to my website.

F-51D Mustang

RAF Mustang Mk.IV

M561 Gama Goat

The next models to be arriving on the website will be the Fairey Gannet AS. Mk.1/4, E.E. Lightning F.2 and Spitfire Mk.22 over the next week or so.