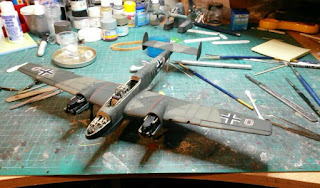
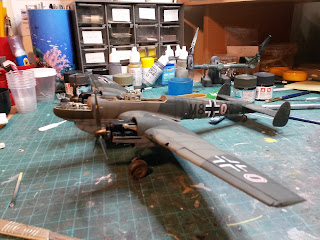
After over two and a half years work (two years on hold) the Bf110 is finally finished. I am well pleased with the end result, it feels like my modelling mojo has returned after its vacation from me!
So, lets carry on from where I last left off. In the last post, I had just finished off spraying the aircraft's camouflage scheme, which i was very happy with how it came out. With building up the colours in lighter coats than I normally would do, the pre-shading showed through a lot better this time. So after I had let the Alclad Aqua Gloss clear dry overnight, the laying of the decals started. I began with putting down the main aircraft markings just in case any of the stencil decals needed to go over the top of them. But on this build, this did not happen unlike on some of my previous builds.
Once all of the stencil decals were added, the model received a couple of coats of Alclad matt clear. I have used to Aqua Gloss clear on a couple of previous aircraft models and was pleased with how it went down on the model, especially for doing the decals. But this was the first time I had used the matt clear and it is great to work with. These Alclad clears are marvelous and I intend to use them in future on my aircraft models, I just need to stock up on more of their range. Just one little thing to remember, make sure you give them a very good shake before using them and if the bottle has been sitting for a while whilst painting.
Now that the decals were finished, it was time to start weathering. First I touched up any of the areas where the pre-shading was not showing as much, plus on the areas of the decals where the sat over panel lines, etc. Next I added some paint chipping over the wing fronts, walkways, nose, propellers, cockpit access points and various hatches on the fuselage and wings. Then using an engine grime wash from AK Interactive, I washed over the engines, various openings, inside the engine covers and under the wings behind the engines. These areas were then finished off with some engine oil wash, with some extra on one of the engines to simulate an oil leak on it. The exhaust staining was created using Carrs rust and soot weathering (model railway product), this was also used for the staining around the aircraft guns. The undercarriage bays, gear and machine gun bay was given a wash with some Vallejo black wash to weather them up a bit. Then some MIG dry mud pigment was used on the wheels, around the undercarriage gear and behind them to look like dust kicked up around the airfield. Once I was happy with everything, another coat of matt clear was used to seal everything.
Once the canopy sections were painted and glued in place on the model, I gave the whole model a light airbrushing of a similar shade to the mud pigment used around the undercarriage. That was the end of this project and another of the "to finish" projects crossed off the list. I built this model so that the upper and lower engine covers, plus the nose machine gun bay cover can be in position on the model or removed. In all, a lovely kit which does build up to be a very nice model straight out of the box. Why did I wait for two years to get it out and complete? I do not know. But I am glad that the Tomcat ran in to issues with the decals and pushed my to finish this one off. Now I have dug out the two Tamiya F4U Corsairs which again have been sitting for nearly two years waiting to be finished. I must clear this backlog of unfinished models I have!


No comments:
Post a Comment