Saturday, 28 September 2013

RAF Museum Hendon Visit September 2013 Pt1

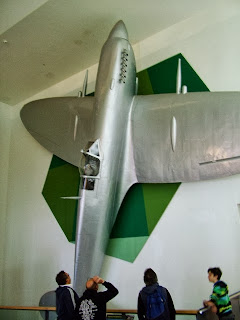
Last weekend, a group of us who know each other via Facebook and on the model show circuit, got together down at the RAF Museum Hendon in North London. Plenty of photos were taken by myself during the day, over 350 of them. The lighting in Hendon is not the best, but I have tried to use the natural lighting where I could and improve them as I edit them.

I will post the best of them over two or three posting on the blog for your pleasure. If you have not been to the museum, it is worth a visit, entry is free but you do have to pay for parking (about £3:60 for up to 6 hours).


Monday, 23 September 2013

Messerschmitt Bf110 D-1/R1 "Dackelbauch" WIP #3

I am doing my usual thing, jumping from one project to another. Now that the Spitfire Mk. XIV is done, I managed to spend a bit more time on the Bf110. This last week I was surprised how much I did get done on the model, we could see some paint going down on the exterior over the next couple of weeks. 

There had been a little mishap a couple of weeks back when I knocked one of the main undercarriage legs and damaged it. This was put aside until I could repair it last week and that just needs a short length of rod replacing on it now to finish the repair. Anyhow, I finished painting the interior and assembled it so that the fuselage could be built up. I do not know why the cannons slung under cockpit are included in this kit as they cannot be seen, especially once the fuel tank is glued in place on the underside of the fuselage. A little bit of cleaning was required on the joint lines, but this only took several minutes to deal with.

One thing has puzzled me with this kit! The nose section comes as two parts which, if you want the nose closed get glued together. But, if you would like the nose open to display the guns, you need to cut off the upper front half of the main section and glue it to the rear upper section. Why did they do this as two parts, the upper and lower halves separately. After I had cut the nose section, there was a gap from the saw blade and I used a etched blade which was thinner then a razor saw.This needed to be rectified with some plasticard which was cut, filed and sanded to shape. You will see what I mean in a photo below.

The tailplane and rudder section assembled without any trouble. I left the tailplane/rudders separate from the fuselage tail section for now as it is easier for handling, also to save them from being damaged. This is the stage of the build where I can start to dry fit things together, just to get an idea of the size of the model and how it is looking. So far, this has been enjoyable to work on and with the engines included in this version of the kit, you can expand your ideas on how to display the model once it is finished. How I am going to display this one, I have not decided yet.

Progress might slow down a little over the next month on this project, I might have a review build to do which will have a months deadline for completion. I will find out on Wednesday if this is happening. There is also another project in the planning involving a couple of Tamiya F4 Corsairs, but more on this later.

Happy modelling.


Tuesday, 17 September 2013

36 Ford 5 Window Hot Rod WIP #1

This is a project that has been sitting in the box for about five years now, waiting for me to open it up and continue with the re-build. This model was part of a set of three built models I brought on EBay with the plan to re-build them, the other two are a 36 Ford convertible and a 40 Ford convertible. This 5 window model was originally painted pink. Yes, I did say pink! The whole model was stripped down to its components and with some help from Fairy Power Spray, the ghastly pink paint was removed.

The body was cleaned up , trim removed and sunroof filled in. I chose to repaint the body with Tamiya's Metallic Black which the main body has had done to it. The bonnet still needed to have some work done to it  and the interior was going to have some new seat fitted. That was as far as I got and the project was put on the sideline in a box on my "To Do" shelf.

Now up to the present day. Once the Mercedes G4 was finished and the Spitfire was nearing completion, I needed something that would be quick to finish and also a car. My 53 Chevy BelAir and 53 Ford Pick-Up have plenty of work to do to them, so this 36 Ford has seen the light of day again.

I took it to work one day last week and when through what was in the box. I dry fitted the body and suspension together to remind me of what it was going to look like, plus what needed to be done still. At this point, I decided to go ahead with what was sitting in the box and use the kits wheels. I had six sets of new wheels from Hoppin' Hydro on order, but was not expecting them to arrive from the States until October. The engine had a final clean-up whilst I was sitting there and then started to re-assemble the main block. The first two photos below were taken in my truck showing what stage I had got up to that day with the original kits wheels.


Today, that very nice postman we have, delivered a package that came from the States. Inside were the six sets of wheels which arrived a lot quicker then anticipated. So tonight, I had a little play with them and came to a choice between two combinations of wheels. The first are 20 inch rims all round which looked nice, but would need some disc brake mounted behind. As I want to finish this project quickly, I would not have the time to source some discs, convert and fit them to the axles.


My second choice was the Chrome Diamonds, of which I had brought in both 20 inch and 24 inch sets. These were the ideal rims for this model, especially with the Metallic Black paint job on the car. The rear is a the right height in my opinion, but the front could be a little bit lower, so some alterations to the front suspension will be done to correct this. I will need to get my lathe out to modify the spacing of the mounting hubs on the rear of the rims for the correct spacing when mounted on the suspension. They sit a bit too wide at the minute.


So that is where I am now. The bonnet and headlight bezels need priming and painting before them and the body get cleared. Some more work needs to be done to the chassis where the moulded exhaust was removed. So tonight, we will see what I get done.

Monday, 16 September 2013

Supermarine Spitfire FR. Mk.XIVe Finished

Sorry I did not get many postings done on this project, but the time frame of the project along with work and family stuff has reduced the time for updating the blog. Anyhow, some progress photos were put up on Facebook as it was quick and easy to do this straight from my phone.

So back to the Spitfire. It was finished yesterday evening and I have to say, I am pleased with how it turned out. I had tried out a new method of masking for myself to do the camouflage and was extremely happy with the end result. I will use this same method when I get around to painting my Vulcan and Victor, plus any of the other models in my stockpile that have similar camouflage patterns on them. 

The decals were laid down over a few evenings and were sealed with a coat of gloss clear followed by a coat of matt clear. Final detail painting was carried out on the undercarriage bays and radiators, before final assemble of the undercarriage gear. The pre-shading did not show through after the camouflage was done, so I mixed up a new mucky brown colour using Tamiya XF-1 Matt Black and XF-52 Flat Earth, then thinned it to a more wash condition. This was airbrushed over a majority of the panel lines on the fuselage and wings.

The canopy glazing had been dipped in some Johnsons Klear, then when I went to start masking the bubble canopy, I noticed a big mould line straight down the centre of the part. I removed this with various grades of sanding sticks then finished the canopy off by polishing the remaining marks out. Once the glazing was masked, they received a couple of coats of the interior green followed by a couple more coats of the camouflage green. The front canopy section had the front screen finished off with some of Alclad's Armoured Glass paint brushed on before gluing the part in position. The bubble canopy had the two yellow dashed lines decals added then coated with some matt clear to seal them before gluing that onto the fuselage.

The last part to finish off was the propeller, this was painted using gloss paints to save me having to gloss clear it for the decals. Once these were added, a coat of matt clear sealed them in and then the model had some chipped paint marks done over certain areas using a small piece of sponge in a pair of tweezers. This was dipped in some aluminium colour paint, dabbed onto some tissue before dabbing lightly on the model. To complete the weathered look, the model received a light dusting of soot weathering powders around the exhausts, guns and shell ejection holes. Once happy with this, a final blow over with some of my dirt mix through the airbrush to tone the colour down a little more and enhance the in-service look.


Knuffingen Airport: The world's smallest airport

I came across some videos of an amazing working model of an airport based on Hamburg's Airport. This very large model, or should I say working diorama has computer controlled vehicles and aircraft which take-off, land and taxi around the apron. I will not bore you by going on about it, just watch the video below and then read the article about it which is on the Daily Mail's website.


Daily Mail : Knuffingen Airport