I have been enjoying this last week off work. We have had a couple of day trips out, Monday we went pony trekking along with my mate Roger and his daughter. Wednesday a drive over to Holmfirth and a visit to the "Last Of The Summer Wine" exhibition, an all time favourite TV programme of mine. But enough of the family stuff, lets get back to the modelling talk.
As what I planned in my previous post, work start on the F40 on the following Friday. Working in this scale in automotive modelling is a joy, the last time I built a car in this scale I was in my teens. The engine was the first part I started to assemble making up the main engine/gearbox assembly, whole exhaust system and air intake manifold. These have all been in the separate sections as listed above to make it easier to paint them. I have also left the rocker covers separate as they need to be painted red, this will be easier to do away from the cylinder heads.


Once the main engine assembly was done, attention was moved over to the chassis. Most of the rear suspension and engine bay has been assembled. I have had to leave a couple of parts off for now as they would prevent me from fitting the engine in place once the engine and chassis are painted. These parts will be painted in preparation to be glued in place on the chassis once the engine is fitted in the bay. The rear brake calipers have also been left off for now as a metal rod needs to be inserted through the suspension uprights and through the gearbox on the engine. This is to represent the half shafts between the gearbox and rear wheels. Some of the front suspension has been done at this stage, but i have stopped work on the chassis to concentrate on painting the engine and final assembling of it.


The next four photos show the engine dry fitted in the chassis. The part on the chassis that I left off is a brace which crosses behind the two intercoolers on the engine. With that in place, I would not get the engine past it. Mind you, in this unpainted condition, it does look impressive as it is.


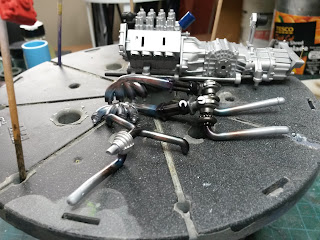
Over the last few days, I have been painting the engine to get it ready for final assembly. Everything was given a couple of coats of Vallejo white surface primer and left to dry overnight. The engine/gearbox assembly and air intake manifold were all painted with Alclad's dark aluminium. I went with this shade as normal aluminium would have been too bright in my opinion. The exhaust system parts all received Alclad's stainless steel. These were then detailed using Alclad's hot metal and manifold shades for heat staining and the dark metal colours of the turbos. The two intercoolers were painted in aluminium using the AK Interactive's new Xtreme Metal range of paints. This paint comes out quite shiny and is simular to Alclad's airframe aluminium in finish. The rocker covers are hand painted using Revell's Aquacolor paints. The colour is carmine red which I put a dab in a mixing palette and add a drop of water to thin it slightly.Thus way you can build up the colour in layers and you do not get the brush marks as much.
Well that is all for now, I hope to be posting photos of the finished engine in a few days time with all of the plumbing on it to.


