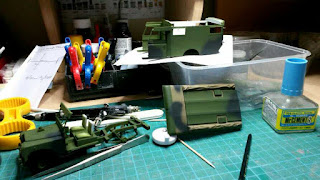
It has been a little slow on the Land Rover over the last couple of weeks. A little problem on the laptop wasted a few days of my time whilst sorting that out and some DIY around the house interfered as well. But there has been some progress on the project though.
Now that all of the decals have been done, it was time to finish off some detail painting and start assembling the body and roof to the chassis. When I was test fitting things, it came to light that the driver had to be in place on his seat before fitting the body and roof. So I started to assemble him in the suitable pose for the driving position. Then whilst cleaning up the other four figures so they could be painted all together, I got thinking to myself, "Where do they all sit?". So after a little look around the internet, I discovered that these ambulances had a three man in them. That then made the driver figure redundant in my plans and allowed me to assemble the model into a finished state apart from weathering, etc. So, once all of the windows, and the ambulance interior was finished, I mounted it on the chassis then glued the roof in place.
Now that the main construction of the Land Rover was finished, I turned my attention to painting the figures. Now, these are still not my favourite area of model building, but if you are doing this type of model or diorama, figures are a must. After assembling and cleaning up the figures, they all were given a coat of white primer and left to dry for a while. The camouflage scheme on the uniforms consist of four different colours, khaki, dark green, khaki green and red brown. So all of the figures were airbrushed all over with khaki for the base colour to start. Next the camouflage pattern was added starting with khaki green, then red brown and finishing with the dark green. Below are the figures after the camouflage patterns were finished on them. One thing, I do not fancy having a go at some of these modern digital schemes they have on uniforms, that is too much work!
When I was satisfied that the patterns looked okay on the figures, I then moved onto their faces. This is my biggest hate with figures, but I brought the flesh paint from Andrea Color last year and used it for the first time on these figures. I first read the (basic) instructions that came with the set, was not happy so watched a couple of videos online. Then made the decision that all of these were for doing larger scale figures and busts, and did not really work with this scale figures. So I adapted the methods shown for myself and this scale. This seems to have worked okay, the colours around the faces are not solid and are my best effort so far. I continued with the detail painting on each of the figures, then did a little wash over them to tone them down a little. Overall, I am happy with how they have turned out. There is still a little more detail painting to do on a couple of them, plus a little weathering around the feet and knee areas of them. I also need to add some bandages to the wounded figure, but still need to work out how to make them in this scale.
During the last week, I made the plinth for the Corsair base to sit on. At the same time, I quickly ran up the base for this Land Rover and figures to sit on out of MDF. The next thing to do is seal it, paint it and then create the scenery for the diorama.


