When I first got this kit, I thought that it was a Russian tank, but then looking at the box artwork, I got to thinking to myself "What is that American car doing there and why are they wearing American uniforms?". Then after a little research into this tank, I discovered that it was actually an American tank developed towards the end of the second world war. They had built two of these beasts and were developing them to destroy the German defences after the D Day invasion. But alas, these large tanks never saw action and only one is left at a museum in America.
So, lets have a quick run through of building this thing. The basic tank is fairly simple, with there not being any interior to build so just the main hull to be assembled. The time consuming parts of construction was the assembly of all the working suspension, with two springs in each unit. Why Dragon did this, is unknown as you will not really see them operating. These are also handed depending on which side of the hull or outer track units they get mounted to. Other things that took time were all of the wheels which need making up. Remember, this tank has four sets of tracks instead of the normal two, plus the track also need the all of the guide teeth glued onto them to, so mind numbing.
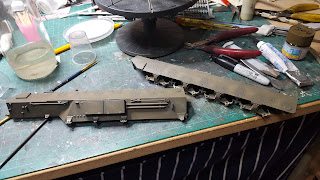
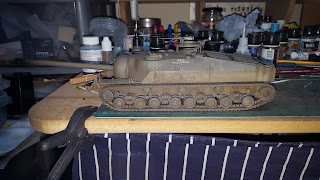
Once all of the suspension, tracks and wheels have been dealt with and assembled, you have to decide how you are going to display the tank. The kit offers two options, firt is to have the outer track unit mounted in position on the hull like in the photo above. Or the second is in their towing position as in the photo below. I made the choice to be able to have the ability to display the model in both set ups as when required. So I did some modifications which would allow this to happen, just by drilling out the pin positions on the locking brackets and use plastic rod to hold the units in place on the hull. A new removable rear brace was also made for when I was displaying the model in the towed set up. So now that this was sorted out, I could continue with building the tank. Dragon did the wise thing and supplied an aluminium gun barrel with the kit. A two piece plastic one would have not done the job, especially with the length of this one, you could not guarantee getting it straight.
A few etch parts were included with the kit to make up the storage boxes, jack brackets, suspension arms and spare track holder. And yes, those tiny squares that you see on the model are little boxes which had to be folded up. There is an aftermarket etched detail available for this model, but I wanted to keep this as a quick build.
From my research photos, I discovered that Dragon had missed out a few areas of the tank. The first was the boxed off areas in the outer track units. This was something that could not be ignored and I quickly made them up out of plasticard and glued them in place. A couple more things missing were the two hooks used to hook the cables over when towing the outer track units. This again was made from plasticard and glued into position on the rear panel of the hull. The final bit of scratch-building that I had done was the lower pulleys for the outer track unit lifting cranes. Looking at various photos, I manage to work out what they kind of looked like and made them up again from the old faithful plasticard.
Now that all of the main construction was done, it was time to start painting the model. After priming everything, I pre-shaded areas of the hull, wheels and barrel. From some old colour photos of the tank, I saw that the inner surfaces where the tracks were, it was painted in a faded light greenish grey colour. So I mixed up some paint to try and match this shade as I thought it might when newly painted and airbrushed the inner surfaces and wheels to match.
For the hull colour, I used Vallejo's US Olive Drab and airbrushed this in light coats. Some of the road wheels were also painted in this colour, but only the ones in the outer facing positions on the outer track units. The next task was painting all of the tyres on the road wheels before assembling them all onto the model.
Final assembly, detail painting and weathering now started on the model, with the push to complete it for the Nationals at Telford. I used a selection of weathering washes, pigments and streaking washes to weather the T28. But I made sure not to do too much as this tank had only been used on a proving ground base, so it would have not got that dirty.
Below you can see the scratch-built hooks what the towing cable hook over. I believe this is what they looked like as the photos I found were old 1940's military ones from the development days. They would have the cables either crossed over like this or have all of the cable eyes in the shackles and loop the cables over the hooks.
Now the finished model, with the two track lifting cranes in their stored positions for transporting. I will be keeping this model in a storage box for safety reasons, as you see it here, the model is about 27 inches long in this set-up. I do not have the shelf space to display her on at the minute, so in the box she will stay for now until she the call to be displayed.
It is a nice model to build overall, not fiddly interior to worry about, mainly because you would not be able to see it when built. It is something different compared to the normal armour models you see displayed on stands at shows. This model has only been to two shows so far, Southwell Show when it was still being built and Telford last weekend. At both shows, she drew a lot of interest from visitors who had never seen or heard of this tank before. But here is a couple of facts about it. The T.28 weighed 95 tonnes, had 12 inch armour plating on it, the gun was 105 mm T5E1, it had a top speed of 8 MPH and was to be transported over distances by rail, hence the detachable outer track units to allow this. Have a look on the internet for this special tank, just put "T28 Super Heavy Tank" in Google and look through the results. There is even a short video on YouTube of the tank being driven along.


