
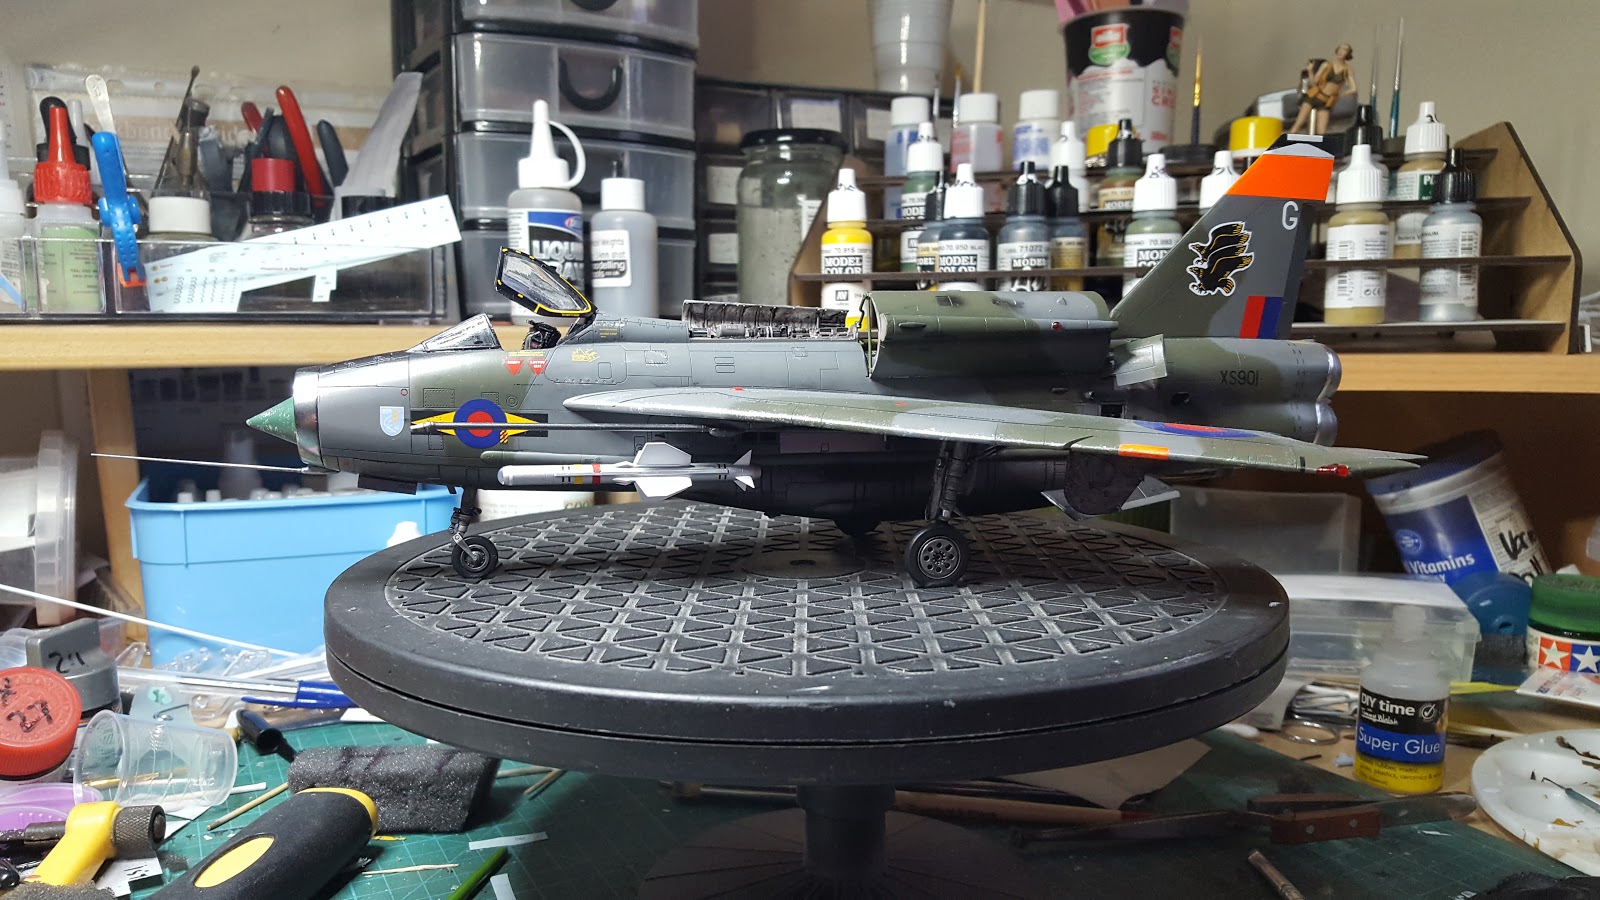
This has to be one of my most favourite builds so far, the Airfix E.E. Lightning F.6 in 1/48th scale with a whole lot of extras added to it. These extra detailing items are as listed as listed below.
CMK: Full cockpit, air intake and front undercarriage bay, control surfaces, main undercarriage bays, air brake doors and housings, electronics compartments and upper engine all in resin.
Aires: Resin engine exhausts.
Eduard: Etched brass cockpit access ladder.
Master-Model: Pitot tube.
I will not bore you with a complete build description, it is basically the same as the F.1 I had built earlier.But I will give you some tips about fitting the CMK resin parts as the instructions that they supply are not very clear. With the cockpit, there are two small thin panels which look like according to the instructions, get glued directly to the cockpit tube. They do not, these are glued directly to the inner surface of the of the fuselage once you have worked out the position of the tube. For the tube to locate properly, use some strips of thick plasticard and glue them to the fuselage for location guides ready for when the tub gets glued in place. With the air intake, drill out some of the waste resin from the cone and the radar body, then fill these voids with some liquid metal for nose weight. The engine bay needs plasticard guide to locate it just like the cockpit tub. Also drill out some of the waste resin from the engine as it a solid piece and adds tail weight to the model. The actuator rams for the airbrakes are the wrong way around in the resin kit. The replacement resin ailerons are smaller than the ailerons on the kit. Finally, the main undercarriage bays need a lot of filing and sanding to get them to fit within the two halves of the wing surfaces. Remove any of the moulded undercarriage detail from the inner wing surfaces, then bit by bit, file and sand the resin bay until it fits in between the two halves. Once you have got it all fitting perfect, take measurements from this one and transfer them to the other undercarriage bay to repeat this process. I hope this helps you. The Aires resin exhausts were not problem, they are a straight swap for the kits plastic ones.
Now that I have got that all out of the way, the rest of the build was straight forward as a normal model. I used Xtracrylix paints for the camouflage scheme on the model with other various paints for detailing, etc. The engine unit was painted using Alclad metal finishes followed by some washes to weather it up. During my research on this build, I noticed that when the upper engine bay cover was open, there was a brace fitted across the opening. So I scratch-built this brace and the cover support from plasticard and plastic rodding. The model was finished off with some light weathering and the Eduard cockpit ladder.
Adding all of these resin parts does increase the weight of the model, it nearly doubles it. If I had of known how much it adds, I would have ordered some cast metal replacement undercarriage for the model. But whilst building the model, I drilled up the centres of each undercarriage leg and inserted a length of thick brass wire to strengthen them. This so far has worked and there has been no breakages of any of the legs yet. But I will advise you to use the metal undercarriage legs if you are going to add this much resin to your model.
As I said at the beginning, this is one of my favourite aircraft builds to date. It will take something special to beat this model, of which there is several in my stash that are up there waiting to take this title.


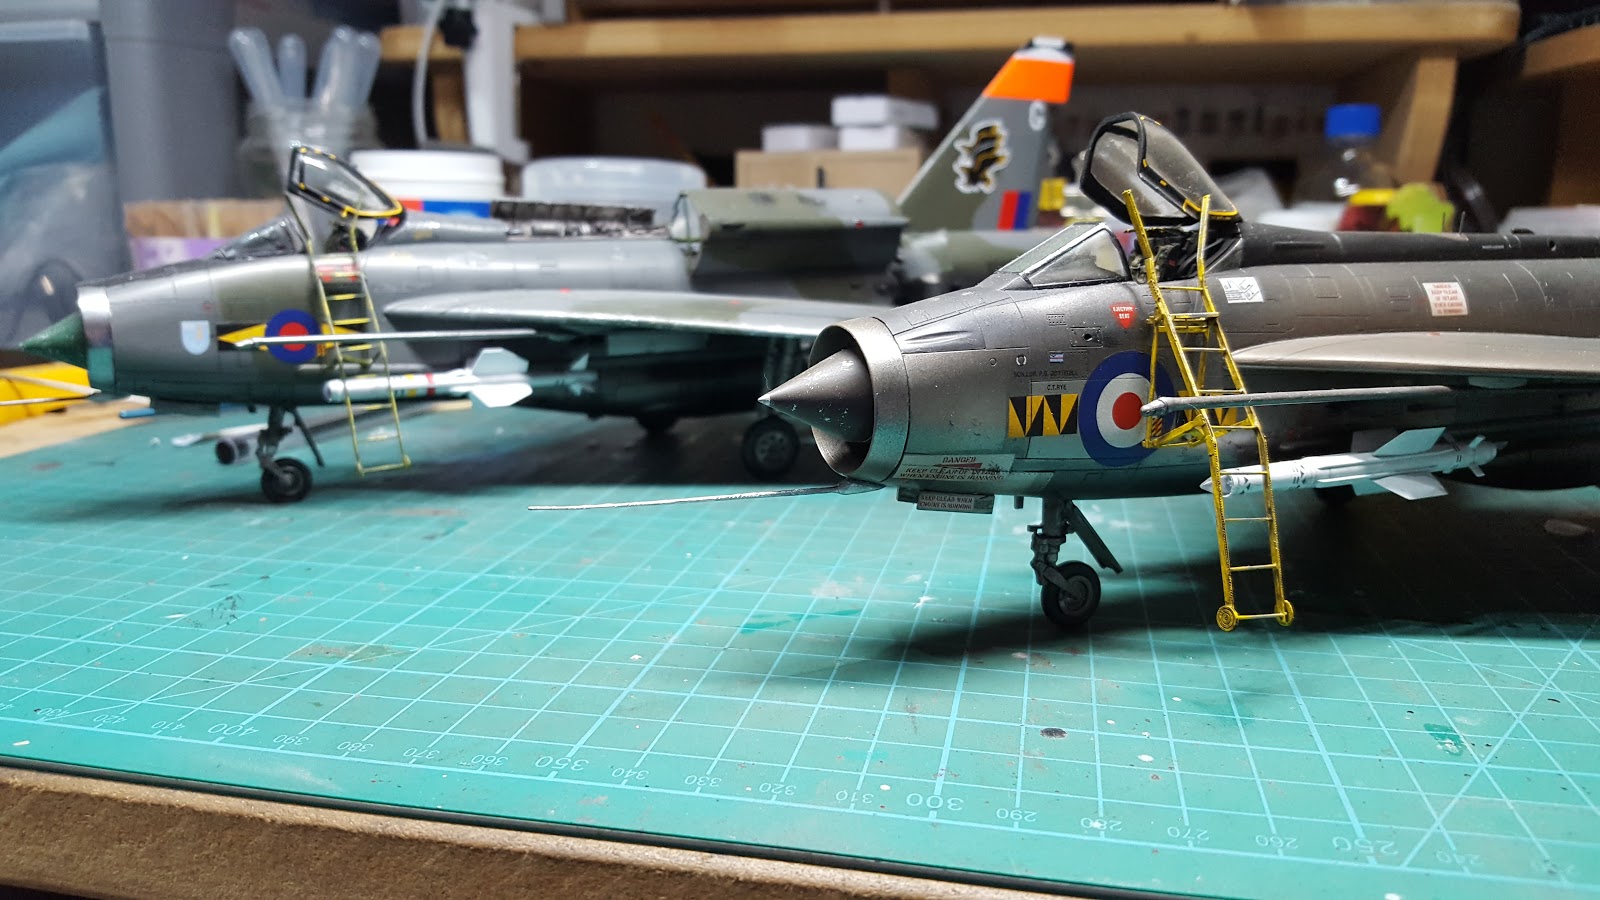
Some photographs of both of my 1/48th scale Lightnings together.


No comments:
Post a Comment